Unlock IoT Control: Free SSH On Mac & Android Guide
In an era defined by interconnectedness, have you ever considered the power of remotely managing your smart home, your Raspberry Pi projects, or your professional network from anywhere in the world? Harnessing the power of SSH (Secure Shell) on your macOS device is not just a convenient option, its a fundamental skill for the modern developer, network administrator, and tech enthusiast, offering secure and efficient control over your Internet of Things (IoT) devices.
The ability to remotely access and manage devices is no longer a luxury, it is a necessity. Whether you are troubleshooting a smart thermostat, updating software on a remote server, or simply monitoring the status of a sensor array, the ability to connect securely from anywhere streamlines workflows and enhances productivity. This guide serves as your comprehensive resource for understanding and implementing SSH for IoT devices on your Mac, unlocking a world of possibilities without incurring any financial burden.
This comprehensive guide will delve deep into the world of SSH for IoT devices. It will cover everything from the basic of SSH and IoT to advanced configurations and troubleshooting tips. Learn how to use SSH remote IoT Mac without complications, and discover how to use Pinggy.io to create secure tunnels for seamless remote management.
- Chloandmatt Onlyfans Latest Leaks Content Explore Now
- Carol Burnett Still Alive Emmy Nomination Life Update
Before you start using SSH to connect to your IoT devices, ensure your Mac is configured correctly. MacOS has SSH already installed, but it might need a nudge to get it up and running. Head over to System Preferences, then click Sharing. If "Remote Login" is unchecked, click the checkbox to enable it, also you can specify which users can access the device.
Understanding the Basics
Secure Shell (SSH) is a cryptographic network protocol providing secure connections between devices over an unsecured network. Think of it as a secure tunnel. SSH encrypts the data transmitted between your Mac and your IoT device, ensuring that even if the network itself is vulnerable, your information remains protected. This is particularly important when accessing devices over public Wi-Fi or untrusted networks.
IoT, or the Internet of Things, refers to the network of physical devices, vehicles, home appliances, and other items embedded with electronics, software, sensors, and connectivity that enable these things to connect, collect and exchange data. SSH serves as a vital access point to these devices, allowing you to remotely monitor, manage, and control them. From managing your smart home ecosystem to working with complex sensor networks, SSH empowers you to take control of your connected devices.
- Jeri Caldwell The Untold Story Of Quincy Jones First Wife
- Decoding The Digital Maze What Is Masalafun Plus More
Setting up SSH on your Mac
Fortunately, macOS comes with SSH pre-installed. Enabling and configuring SSH is the first step.
- Step 1: Enable Remote Login. Navigate to System Preferences > Sharing. Check the "Remote Login" box. This enables SSH on your Mac.
- Step 2: Specify Allowed Users. Click "Allow access for:" and choose the users who can connect remotely. You can select all users or restrict access to specific accounts for added security.
- Step 3: Firewall Considerations. If your Mac's firewall is enabled, you may need to allow incoming connections for SSH. Go to System Preferences > Security & Privacy > Firewall and click "Options." Make sure SSH is allowed.
- Step 4: Find Your Mac's IP Address. You will need your Mac's IP address to connect to it remotely. You can find this in System Preferences > Network. The IP address is usually listed next to your Wi-Fi or Ethernet connection.
Connecting to Your Mac from Another Device
Now that SSH is set up on your Mac, you can connect to it from another computer or device.
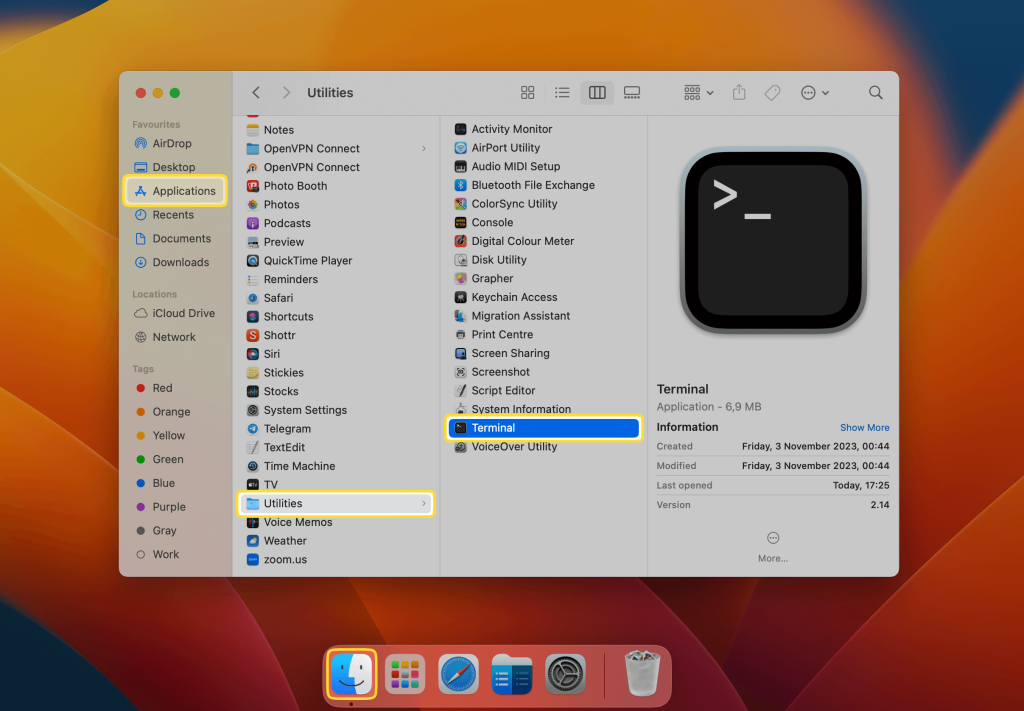
- Using the Terminal (on another Mac or Linux Machine): Open the Terminal application. Type ssh username@your_macs_ip_address and press Enter. Replace "username" with your macOS username and "your_macs_ip_address" with the IP address you found earlier. You will be prompted for your password. After entering the correct password, you will have access to your macOS terminal.
- Using SSH Clients (Windows): While macOS has a built-in SSH client, Windows users will need to use a third-party client like PuTTY or Windows Terminal. Download and install your chosen client. Enter your Mac's IP address and username in the appropriate fields, and connect.
Connecting to your IoT device
Once you have successfully enabled SSH on your Mac and can connect to it remotely, the next step is to connect to your IoT devices. Generally, you will connect to the IoT device through the same process as connecting to your Mac remotely. Ensure the device is connected to the same network as your Mac.
- Find the IP Address of Your IoT Device: This is typically done through your router's administration page, by accessing the device's configuration, or through a connected display.
- Connect via SSH: Open your terminal and use the ssh command. The command should be like this: ssh [username]@[IP address of the IoT device]. Replace "[username]" with the username for the device, and replace "[IP address of the IoT device]" with the IP address.
- Enter Password: You will be prompted for the password of the device.
If you need to connect to your IoT device when you're not on the same network, you will need to set up either port forwarding or tunneling.
Port Forwarding
Port forwarding allows you to securely access services running on your IoT devices through your Mac. It's useful when you want to access specific applications or services on your IoT device, such as a web server or a database, which typically runs on a specific port.
The process:
- Configure Port Forwarding on Your Router: Access your router's configuration page, usually by typing its IP address in your web browser. Look for the "Port Forwarding" or "Virtual Servers" section.
- Create a Port Forwarding Rule: Create a new rule. Specify the internal IP address of your IoT device, the port number of the service you want to access (e.g., port 80 for a web server), and the external port number (you can choose a port number on your router that you can remember).
- Access the Service: After setting up port forwarding, you can access the service running on your IoT device by typing your router's external IP address (or your dynamic DNS hostname) and the external port number in your web browser or SSH client.
Tunneling
Tunneling creates an encrypted connection between your Mac and your IoT device, enhancing security, especially when you are connecting from an untrusted network. It encrypts all traffic between your device and your Mac, preventing eavesdropping and ensuring data privacy.
How to set up SSH tunneling:
- Choose a Local Port: Decide on a local port number on your Mac to use for the tunnel.
- Use the ssh command with the -L option: Open the terminal and type the following command: ssh -L [local port]:[IoT device IP]:[IoT device port] [username]@[your Mac's IP address]Replace [local port] with your selected local port number, [IoT device IP] with the IP address of your IoT device, [IoT device port] with the port number of the service on the IoT device, [username] with your username, and [your Mac's IP address] with your Mac's IP address.
- Access the Service: After setting up the tunnel, you can access the service on the IoT device by pointing your web browser or client to the local port you specified (e.g., localhost:[local port]).
These two methods provide robust ways to access your device.
Android Apps and Tools for SSH Access
By leveraging Android apps and tools, you can unlock SSH access to your IoT devices without spending a dime. There are many free applications available that will allow you to use SSH to connect to devices from anywhere in the world using your smartphone. The apps provide a secure, encrypted connection that protects your data.
Troubleshooting Common Issues
Encountering issues is a part of the process. Here are some tips to troubleshoot common problems you might face when setting up and using SSH for your IoT devices:
- Connection Refused: Check the IP address, ensure SSH is enabled on your devices, and verify that no firewall is blocking the connection.
- Incorrect Password: Double-check your username and password for both your Mac and your IoT devices.
- Firewall Issues: Make sure that your Mac's firewall allows incoming connections for SSH, and that your router's firewall isn't blocking the connection.
- Port Forwarding Errors: Confirm that you have entered the correct IP address, port numbers, and protocol (TCP) in your router's port forwarding settings.
- Network Connectivity: Verify that both your Mac and your IoT devices are connected to the internet and can communicate with each other.
Best Practices for Secure SSH Management
Here are some steps to ensure that your SSH connections remain secure, and your devices are protected.
- Use Strong Passwords: Create strong, unique passwords for your Mac and your IoT devices.
- Keep Your Software Updated: Regularly update the operating systems and software on your devices.
- Disable Root Login: Avoid logging in directly as the root user.
- Use Key-Based Authentication: Implement SSH key-based authentication.
- Monitor Logs: Review your SSH logs regularly to identify any suspicious activity.
Expanding Your Horizons
Here are some advanced techniques to improve your IoT device control:
- SSH Key-Based Authentication: Eliminate the need for passwords by using SSH keys for authentication.
- Dynamic DNS: If your internet provider assigns you a dynamic IP address, use a dynamic DNS service.
- SSH Configuration Files: Customize your SSH settings using the configuration file.
- Automated Scripts: Use scripts to automate repetitive tasks such as updating software or backing up data.
Iot Remote Monitoring
IoT remote monitoring involves the surveillance of smart technology as they operate in tandem with each other. Typically, an administrator uses a software program or application to view the status of each IoT device from a centralized digital control center. This allows for constant monitoring of devices and helps quickly resolve issues when they arise.
Benefits of Remote SSH for IoT
Learning how to use SSH remote IoT on mac for free opens up a world of possibilities for managing and controlling IoT devices from anywhere in the world. Here are some advantages.
- Enhanced device control and management from anywhere.
- Secure and reliable connection.
- Adherence to best practices and security recommendations.
This comprehensive guide should enable you to master the usage of SSH to connect to your IoT devices on your Mac. By following the steps in this guide, you can be on your way to mastering remote management of your IoT devices.


Detail Author:
- Name : Kaylie Strosin PhD
- Username : beatrice96
- Email : jaskolski.jamir@yahoo.com
- Birthdate : 1974-11-08
- Address : 29159 Greenholt Prairie Angelofort, VT 76237
- Phone : +1.681.906.8312
- Company : Hoppe PLC
- Job : Speech-Language Pathologist
- Bio : Quo enim similique omnis sequi placeat doloremque inventore vel. Quo minima voluptas voluptatem. Saepe vitae eaque perspiciatis quia consequatur.
Socials
facebook:
- url : https://facebook.com/vwiza
- username : vwiza
- bio : Ex voluptatem dolorem aut eveniet quos eius. Minus omnis voluptas sit vitae.
- followers : 4173
- following : 495
twitter:
- url : https://twitter.com/wizav
- username : wizav
- bio : Magnam asperiores sit ut. Reiciendis facere distinctio corporis et. Aperiam sit earum veritatis incidunt deleniti.
- followers : 5769
- following : 2256
linkedin:
- url : https://linkedin.com/in/veda_real
- username : veda_real
- bio : Repellat voluptatibus non sit qui rem saepe ut.
- followers : 2765
- following : 968
instagram:
- url : https://instagram.com/veda.wiza
- username : veda.wiza
- bio : Aspernatur ut sapiente autem ea quam quis. Quia quos harum sint odio. Ad quam dolor dolores aut.
- followers : 6053
- following : 1251
